
 @jaibhasin
dsh-browser-agent
Chrome side-panel browser agent powered by DeepSeek Harness
- Stars
- 10
- Language
- TypeScript
- Created
- Sep 4, 2026
- Updated
- Oct 11, 2026
Introduction
dsh Browser Agent 
A plugin for Deepseek Harness which lets you control your chrome tabs simultaneously and parallelly.
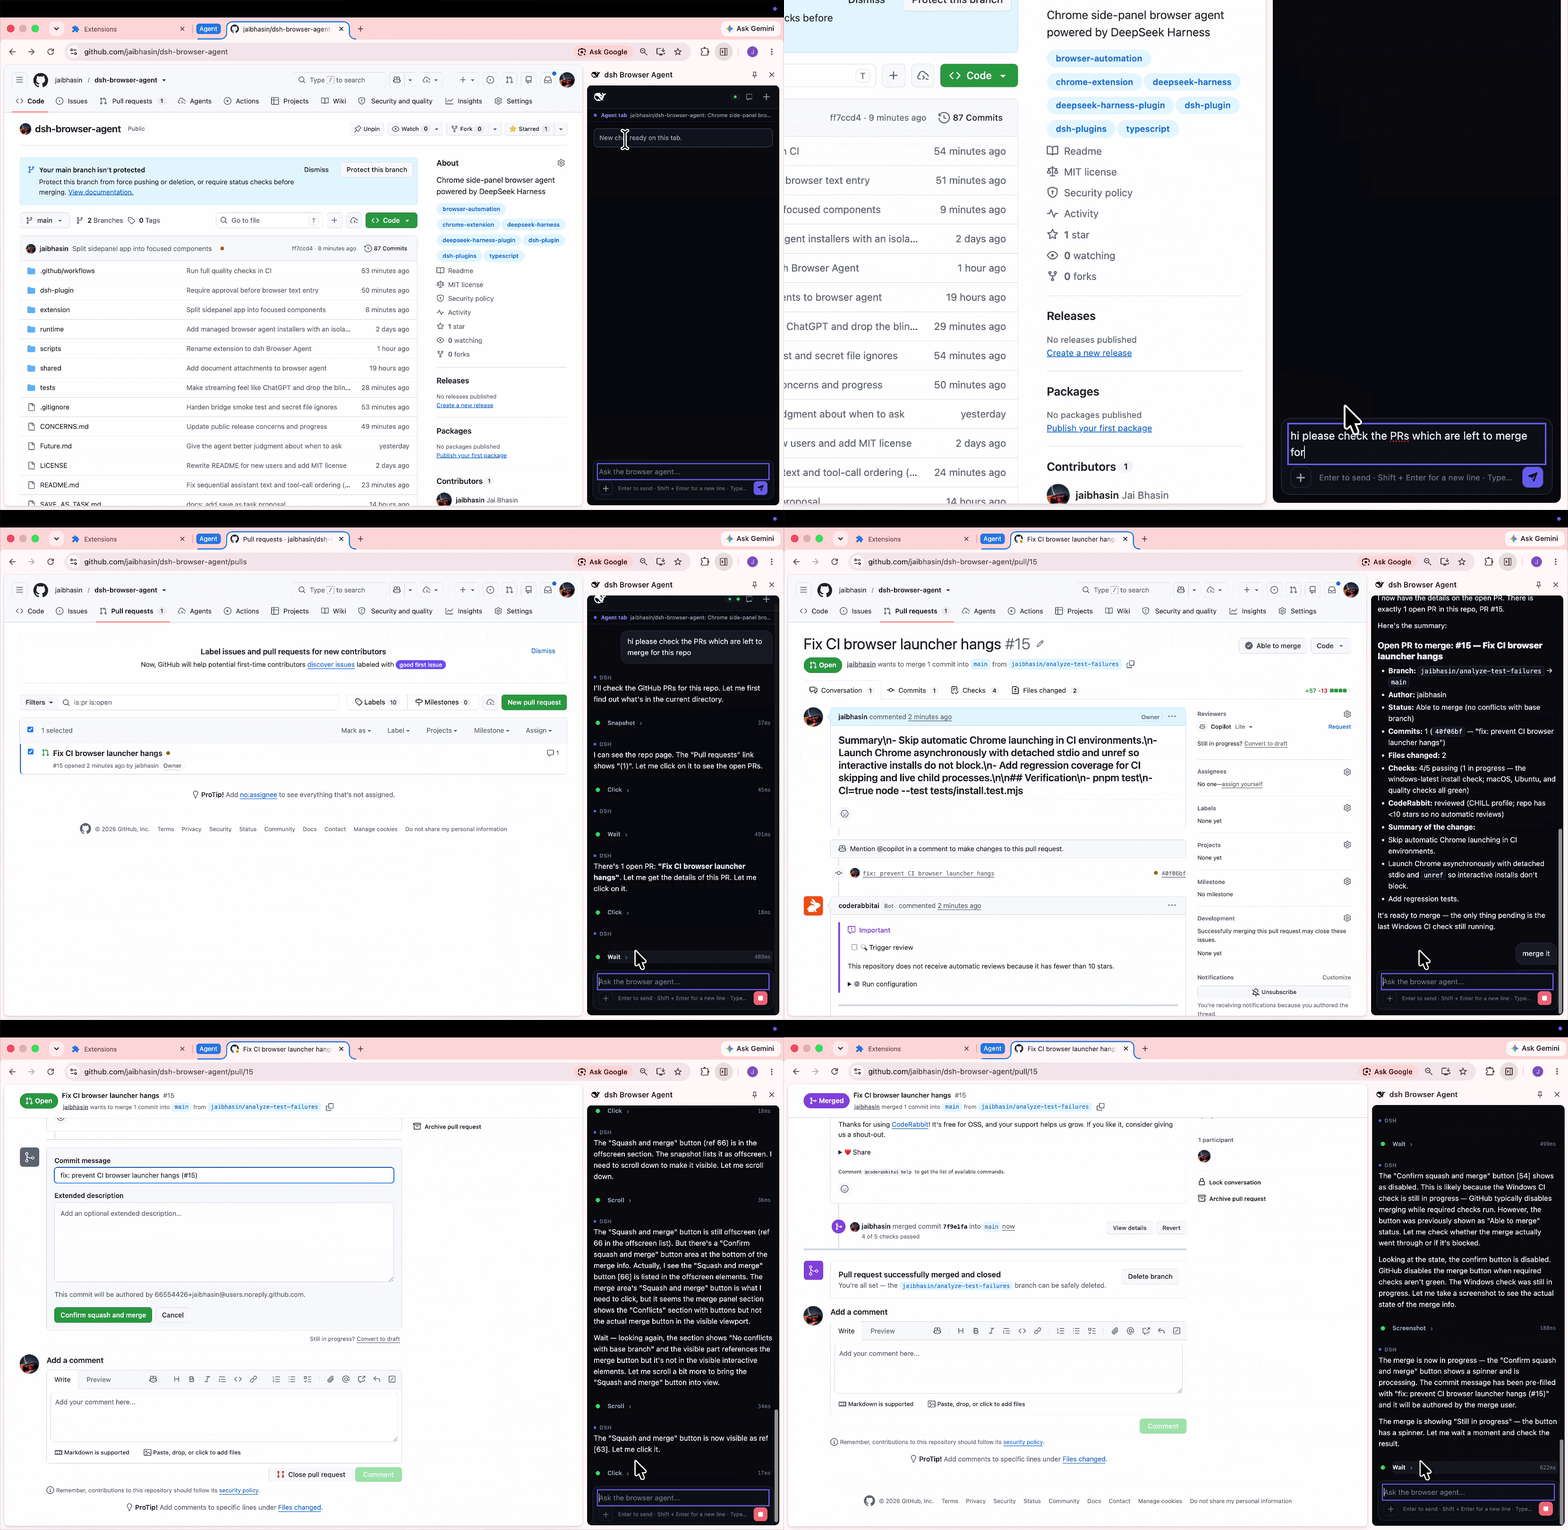
It can read, write, navigate, take DOM snapshot, screenshot, ask questions in between, scroll etc.
It can work with any LLM of your choice.
Quick install
Standard dsh plugin command won't work here. As it include both dsh bridge and browser extension.
This one line command installs the full project
macOS / Linux:
curl -fsSL https://raw.githubusercontent.com/jaibhasin/dsh-browser-agent/main/scripts/install.sh | bash
Windows (PowerShell):
$script = Join-Path $env:TEMP 'dsh-browser-install.ps1'; Invoke-WebRequest -UseBasicParsing 'https://raw.githubusercontent.com/jaibhasin/dsh-browser-agent/main/scripts/install.ps1' -OutFile $script; powershell -NoProfile -ExecutionPolicy Bypass -File $script
When the setup completes it prints the extension folder and start command you'll need next.
First run the node ".../start.mjs" command from the installer and keep that terminal open.
This starts DSH before the extension loads and tries to connect.
Then go to chrome://extensions, turn on Developer mode, click Load unpacked, and select the folder the installer printed.
Open the web address DSH prints, add your API key, and pick a model.
Then click Extensions > dsh Browser Agent in Chrome and start chatting.
Use the same start command next time; Ctrl+C stops the agent.
Open the agent as a Mac app
DSH Browser Agent.app starts the installed agent when you open it. Wait for Ready for Chrome, then click dsh Browser Agent in Chrome’s Extensions menu. There is no need to open the repository or a terminal.
The app includes start and stop controls, agent settings, logs, and a menu bar shortcut. Closing its window keeps the agent running. Choose Quit Browser Agent or press Cmd+Q to stop its services.
To build the app from this checkout after installing the agent, run pnpm build:macos on a Mac with Xcode command line tools.
Move .macos-build/DSH Browser Agent.app into Applications.
The app includes its own Node executable and uses your existing managed installation and settings under ~/.dsh.
If you use another data directory, run node scripts/build-macos-app.mjs --dsh-home /path/to/data.
Run pnpm test:macos to check authenticated startup, restart, port conflicts, and process cleanup.
Start an existing browser-agent profile again
If you set up the older browser-agent profile from a checkout, start its backend with this command on one line:
node "$HOME/.dsh/profiles/node_modules/@deepseek-ai/dsh/lib/bin.js" --profile browser-agent --no-open
Keep the terminal open while using the extension, and press Ctrl+C to stop the backend.
Agent tools
List of tools the agent has access to by default
| Tool | What it does |
|---|---|
ask_user | Asks the user for a missing choice or detail. |
browser_snapshot | Reads page text and gives buttons, links, and fields numbered references. |
browser_navigate | Opens an HTTP or HTTPS URL in the chat's assigned tab. |
browser_tabs | Lists tabs assigned to DSH sessions. Listing all regular tabs requires confirmation because their titles and URLs are shared with the chosen model provider. Incognito tabs also require Chrome's separate incognito access setting and a separate user confirmation. |
browser_wait | Waits for the page to settle, then takes a fresh snapshot. |
browser_screenshot | Takes a PNG screenshot of the visible part of the chat's tab. Optional annotate: true adds boxes and numbered labels using the latest snapshot's refs. |
browser_scroll | Scrolls up, down, left, or right by a number of pixels. |
browser_click | Clicks a button, link, or other element by its reference number. |
browser_type | Types into a field by its reference number. |
Type /tools in the extension to turn individual tools on or off.
Annotated screenshots put the snapshot's numbers on the picture: if the snapshot
lists [1] Search, the screenshot shows [1] beside the Search button, helping the
agent see which button it can click. The extension briefly adds the labels over the
page, takes the screenshot, then removes them.
To use this, the agent takes browser_snapshot, then calls browser_screenshot
with annotate: true. Only visible controls get labels. Refresh the snapshot if
the page changes; omit annotate for a plain screenshot.
Tabs and chat sessions
Each chat belongs to a tab
Each chat session can be attached to one tab and each tab can have one chat session open at a time.
You can move the chat from one tab to another and also keep the chat active in background
Closed tabs can be reopened by clicking on their chats through chat history
When you switch tabs during work
Switch to another tab while the agent is working, and you'll get these choices:
| Choice | What happens |
|---|---|
| Continue in background | Agent continues on the original tab while you browse elsewhere. |
| Pause current chat | Agent stops and the chat stays saved. |
| Quit current chat | Agent stops and the chat is deleted from the extension's history. |
| Move current chat here | Agent's session moves to the newly selected tab. |
If you switch to a tab that already has a chat session you can continue with it or start a new one
If you open another saved chat while the agent is busy, you'll also get a chance to keep the current agent running, pause it, or quit it.
When a background agent needs to ask a question or an approval, a Chrome notification lets you jump back to it.
Use /notifications to turn the notification sound on or off.
What you can do
- Ask it to read a page, follow links, fill out fields, scroll, or take a screenshot.
- Run separate chats in different tabs and switch between them as you work.
- Come back to a saved chat with its messages, tool activity, and recent website links.
- Attach an image or document and ask questions about it.
- Turn individual tools on or off for each chat, with approval prompts for clicks, typing, and navigation.
Image attachments can be PNG, JPEG, WebP, or GIF. For documents, you can attach Word, PDF, CSV, Excel, PowerPoint, OpenDocument, RTF, EPUB, Markdown, and plain text files. Documents are converted locally before their text is sent to your model provider.
Save something you'll do again
If a conversation gets you through a task you'll repeat, choose Save as a task in the chat header.
The agent drafts reusable instructions from the conversation for you to review and edit before saving.
Next time, type /tasks, pick the task, and fill in any details it needs for that run.
You can also find and edit your saved tasks in chat history.
Say it instead of typing it
Click the microphone beside the message box to set up voice input.
Use browser dictation without another API key, or choose Groq, OpenRouter, Deepgram, or ElevenLabs with your own key and transcription model.
Your words go into the message box, so you can check or edit them before sending.
To change your setup later, type /voice-config.
Updates and uninstall
To update, stop DSH, run the installer again, and click the circular Reload button on the dsh Browser Agent card at chrome://extensions.
Your settings are kept, and you won't need to choose the extension folder again.
To uninstall, stop DSH and run the uninstall command printed during setup. If you still have the downloaded project folder, open a terminal there and run:
# macOS / Linux
bash scripts/uninstall.sh
# Windows
node scripts/install.mjs --uninstall
The uninstaller keeps a backup of the installation and its settings in folders ending in .uninstalled-* followed by a timestamp.
You can delete those folders once you're sure you don't need them.
They may contain private data.
Finally, remove dsh Browser Agent from chrome://extensions to delete the extension and its saved browser data.
Troubleshooting
| What you see | What to do |
|---|---|
node is not found | Install Node.js 22.19+ (22.x) or 24+, then reopen your terminal. |
| Chrome cannot find the extension | Select the exact folder printed by the installer, including the final extension directory. |
| The side panel is disconnected | Start DSH with the installer-provided command and keep the terminal open. |
Port 7331 or 3080 is already in use | Stop the other DSH instance, then start this one again. |
| Multiple Chrome profiles alternate between Live and Offline | Restart DSH and click Reload on the extension card in each profile so every profile uses the multi-profile bridge protocol. |
| Changes do not appear after an update | Restart DSH and click Reload on the extension card. |
| A screenshot cannot be taken | Make the chat's assigned tab visible and try again. |
A tool fails on chrome:// pages | Try a normal website; Chrome restricts access to internal pages. |
How it works
flowchart LR
    User[Your message in the side panel] <--> DSH[DSH on your computer]
    DSH <--> Model[Your AI provider]
    DSH <-->|Local connection| Extension[Chrome extension]
    Extension <-->|Reads and acts on| Tab[Your chat's tab]
Your message goes through DSH to your chosen AI model. If the model needs to read the page or click something, it asks the extension to do that in your chat's tab. The extension sends back the result, and the model uses it to decide what to do next. Those steps show up in the side panel as it works.
The browser agent gets its own DSH installation and settings, so it won't replace an existing DSH setup. Its dependencies are locked to tested versions to avoid mixing incompatible releases.
Privacy and control
The agent works on your real, signed-in tabs, so its actions affect your actual accounts.
That's why approval prompts are on by default for clicks, typing, and navigation.
Use /human-in-the-loop to turn them off or back on for the current chat.
The connection between Chrome and DSH stays on your computer and uses a private token. Your chats and saved tasks are stored in the local DSH browser-agent data directory, so they are shared across Chrome profiles using the same DSH installation and survive extension rebuilds. Your chosen AI provider receives your messages and the page content the agent reads, along with any screenshots or attached images it uses. Documents are converted to text locally before that text is sent to the provider; scanned PDFs aren't uploaded or processed with OCR.
For voice input, recordings go to the transcription provider you choose, and its API key is saved in the extension's local settings. Browser dictation uses Chrome's speech recognition instead. Keep your extension data, DSH settings, and installation backups private: they can contain credentials and personal information.
The installer pulls from this repo's main branch, so only run it from sources you trust.
Development
The managed installation uses DSH 0.1.6-alpha.2 with a separate dsh-browser-agent profile.
Files live under ~/.dsh/dsh-browser-agent by default.
Set DSH_HOME before installation to use another DSH data directory.
The bridge listens on 127.0.0.1:7331. Connections must use the exact installed extension Origin, a loopback Host header, and the generated token. Installation retains a public key in .extension-public-key to keep the extension ID stable; the key is public, and the token remains the secret credential. The profile's dsh-browser-agent configuration includes extensionId; when configuring the bundle through environment variables, set DSH_BROWSER_EXTENSION_ID alongside DSH_BROWSER_BRIDGE_TOKEN.
On the first upgrade from an installation without a manifest key, Chrome's extension ID changes. Remove the old extension and use Load unpacked with the installed folder; extension-local preferences will need to be set again. Subsequent updates retain the ID. Development setup writes the key into the built manifest without changing the checked-in source manifest.
Set up a checkout
Use Node.js 22.19+ (22.x) or 24+, and pnpm 11.8.0, matching the project's packageManager setting.
git clone https://github.com/jaibhasin/dsh-browser-agent.git
cd dsh-browser-agent
npm install --global pnpm@11.8.0
pnpm install --frozen-lockfile
Build and run
pnpm build
To test the complete product from your checkout, run bash scripts/install.sh on macOS/Linux or powershell -NoProfile -ExecutionPolicy Bypass -File scripts/install.ps1 on Windows.
This copies your current source into the managed installation, builds both components, and configures the dedicated runtime.
Follow the printed Chrome and startup instructions.
After changing source, stop DSH, rerun the local installer, reload the extension, and restart DSH.
pnpm dev starts Vite for frontend development; browser integration still requires Chrome and the local DSH bridge.
The older pnpm setup:dsh-profile helper targets the separate browser-agent development profile and rewrites its configuration, so it is not the recommended installation path.
Never commit generated bridge tokens or extension/.env.local.
Tests
pnpm test
This checks browser session behavior, saved tasks, voice configuration, attachments, provider errors, memory benchmarks, and the installer, among other things. It doesn't replace trying the extension in Chrome with a real model.
For the guided multi-tab memory benchmark, see the benchmark instructions.
Run the full installer lifecycle test with internet access:
# macOS / Linux
DSH_INSTALL_E2E=1 node --test tests/install-e2e.test.mjs
# Windows
$env:DSH_INSTALL_E2E = '1'
node --test tests/install-e2e.test.mjs
The lifecycle test uses a temporary DSH home and checks installation, updates, runtime startup, authenticated session creation, and uninstall without an API key. The installer compatibility workflow runs it on macOS, Windows, and Linux with Node.js 24.
Project layout
extension/       Chrome background worker, page scripts, and React side panel
dsh-plugin/      DSH plugin, agent tools, and WebSocket server
shared/          Bridge protocol and tool definitions
runtime/         Pinned DSH runtime manifest and npm lockfile
scripts/         Installers, uninstaller, and profile setup helper
tests/           Browser state and installer tests
License
MIT - Copyright (c) 2026 Jai Bhasin.